


Photo by Glenn Carstens-Peters on Unsplash
Intergrate sonarqube in Jenkins. A gentle intro to Jenkins DevSecOps.


Table of contents
- 1. Set up, configure and install Jenkins on a digital ocean droplet.
- 1.1 Head over to Digital Ocean and create an account if you do not already have one, otherwise log in.
- 1.2 Create a digital ocean droplet with the following specs.
- 1.3 Configure the firewall rules to open port 22 (for ssh connections ) and port 8080 (for our Jenkins server).
- 1.4 Install docker in the droplet.
- 1.5 Run Jenkins as a docker container
- 2. Install and configure sonarqube in the digital ocean droplet.
- 3. Create a multi-branch pipeline and configure it for Django.
- 4. Intergrate Email sending functionality.
In this article, you will learn how to set up Jenkins in a digital ocean droplet, configure it, Install sonarqube, configure and link it to our Jenkins pipeline and how to send emails in Jenkins. We will also finally deploy the application to an aws ec2 instance.
This article assumes a basic understanding of docker.
1. Set up, configure and install Jenkins on a digital ocean droplet.
1.1 Head over to Digital Ocean and create an account if you do not already have one, otherwise log in.
1.2 Create a digital ocean droplet with the following specs.
- An image - Ubuntu: the Lts tag
- Plan - 4GB 2 AMD CPUs
- Datacenter region - (preferably one close to your location)
- Authentication method - (ssh keys) and copy your public key to Digital Ocean. follow this link to create ssh keys.
1.3 Configure the firewall rules to open port 22 (for ssh connections ) and port 8080 (for our Jenkins server).
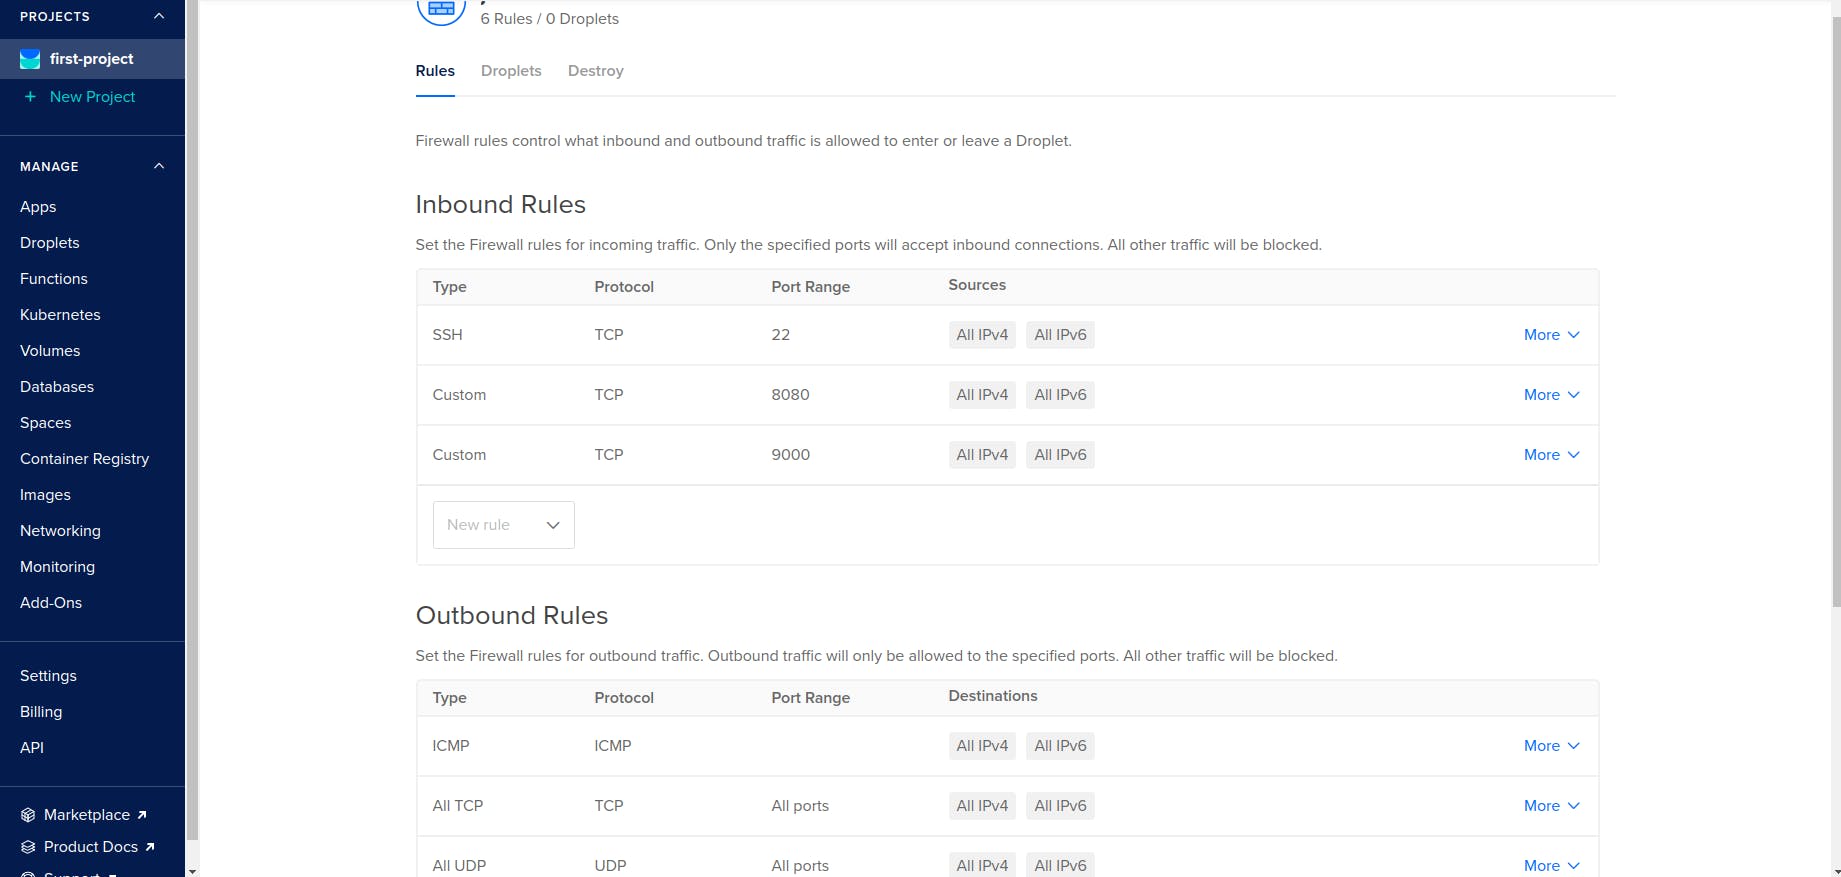
Ensure ports 22 and 8080 are open to receive requests.
1.4 Install docker in the droplet.
On your machine, ssh into the digital ocean droplet by
ssh YOUR_DROPLET_IP@root
Update the digital ocean droplet by
apt update
Upgrade the digital ocean dependencies by:
apt upgrade -y
Install docker runtime engine by:
apt install docker.io -y
1.5 Run Jenkins as a docker container
Run the following command whilst being ssh'ed into the digital ocean droplet.
docker run -p 8080:8080 -p 50000:50000 -d \
-v jenkins_home:/var/jenkins_home \
-v /var/run/docker.sock:/var/run/docker.sock \
-v $(which docker):/usr/bin/docker jenkins/jenkins:lts
Access the Jenkins server on the web using the server's public IP as shown below
YOUR_DO_DROPLET_IP:8080
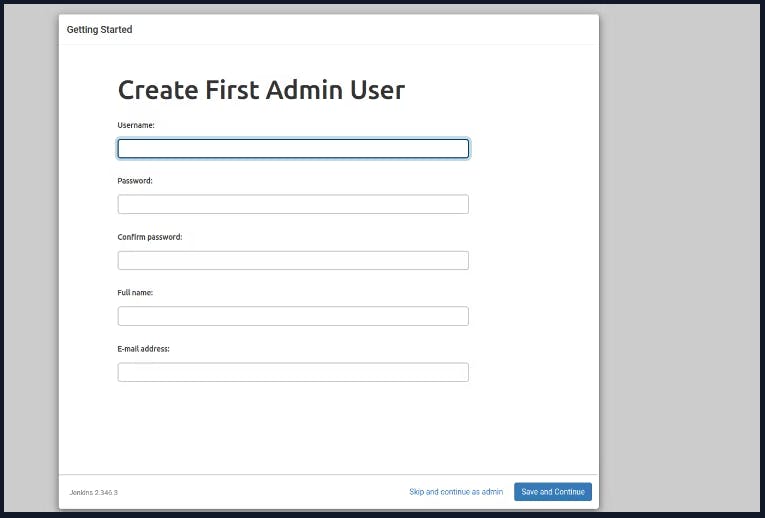
After a successful installation of Jenkins in the Docker container, you should see a screen similar to the one below that will prompt you for an administrator password
#use this command to get the initialAdminPassword
cat /var/lib/docker/volumes/jenkins_home/_data/secrets/initialAdminPassword
copy the password and login into Jenkins. We can now create our first Jenkins user.
2. Install and configure sonarqube in the digital ocean droplet.
2.1 SSH into the digital ocean droplet by
ssh YOUR_DO_IP@root
2.2 Run sonarqube as a docker container
docker run -d --name sonarqube -p 9000:9000 -p 9092:9092 sonarqube
N/B ensure that port 9000 is configured on your firewall and can receive requests
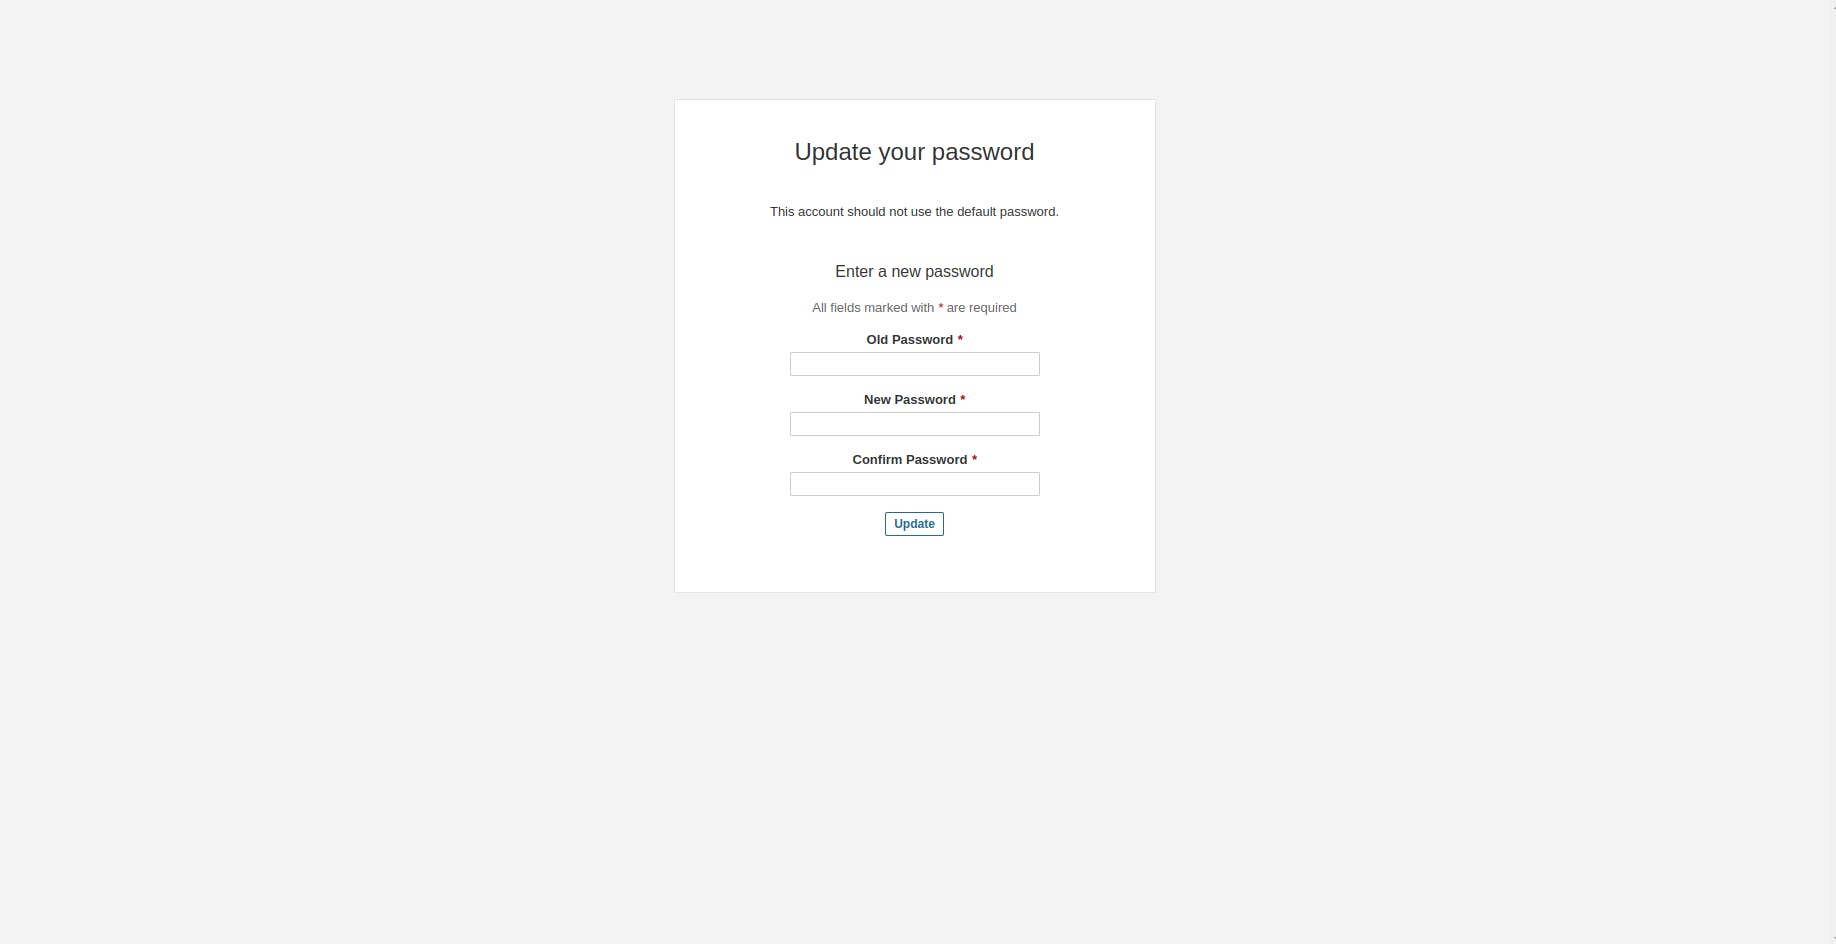
Login to the sonarqube server by using the default username admin and default password admin
You will be redirected to a page where you will reset the default password
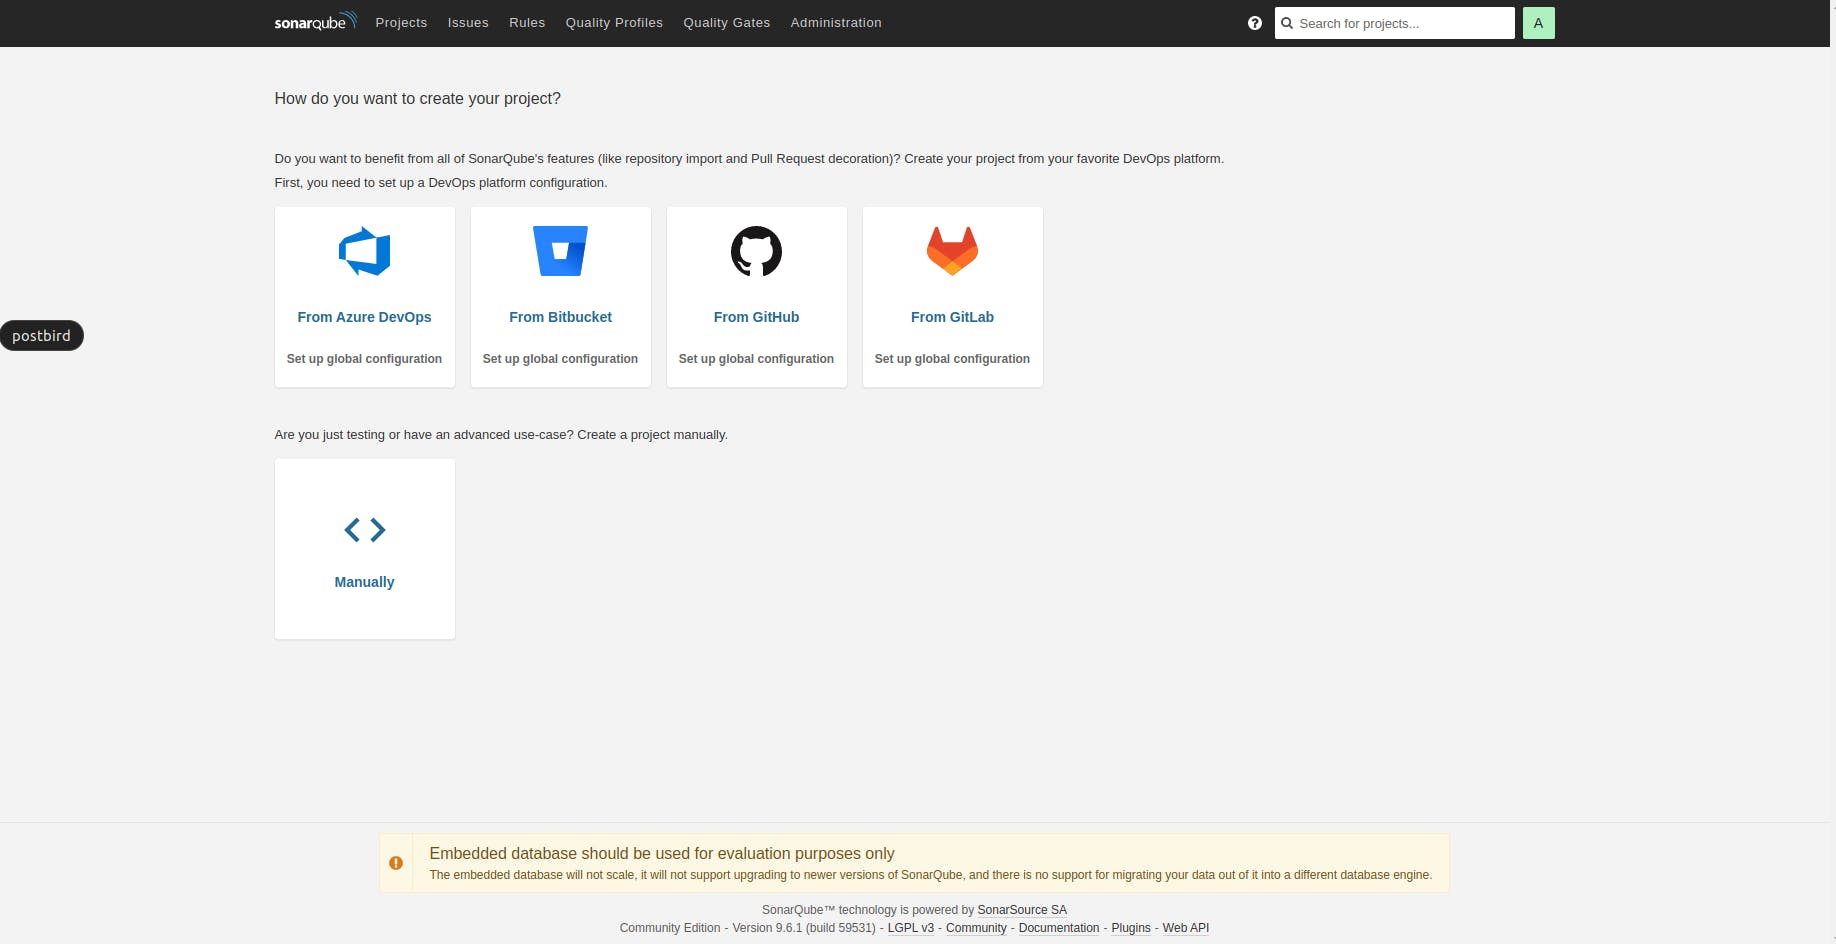
You will now be redirected to the sonarqube dashboard
You have successfully installed sonarqube and Jenkins on the digital ocean droplet
2.3 Configure Sonarqube in Jenkins.
In your Jenkins dashboard, navigate to the manage Jenkins -> Manage Jenkins and install the Sonarqube scanner
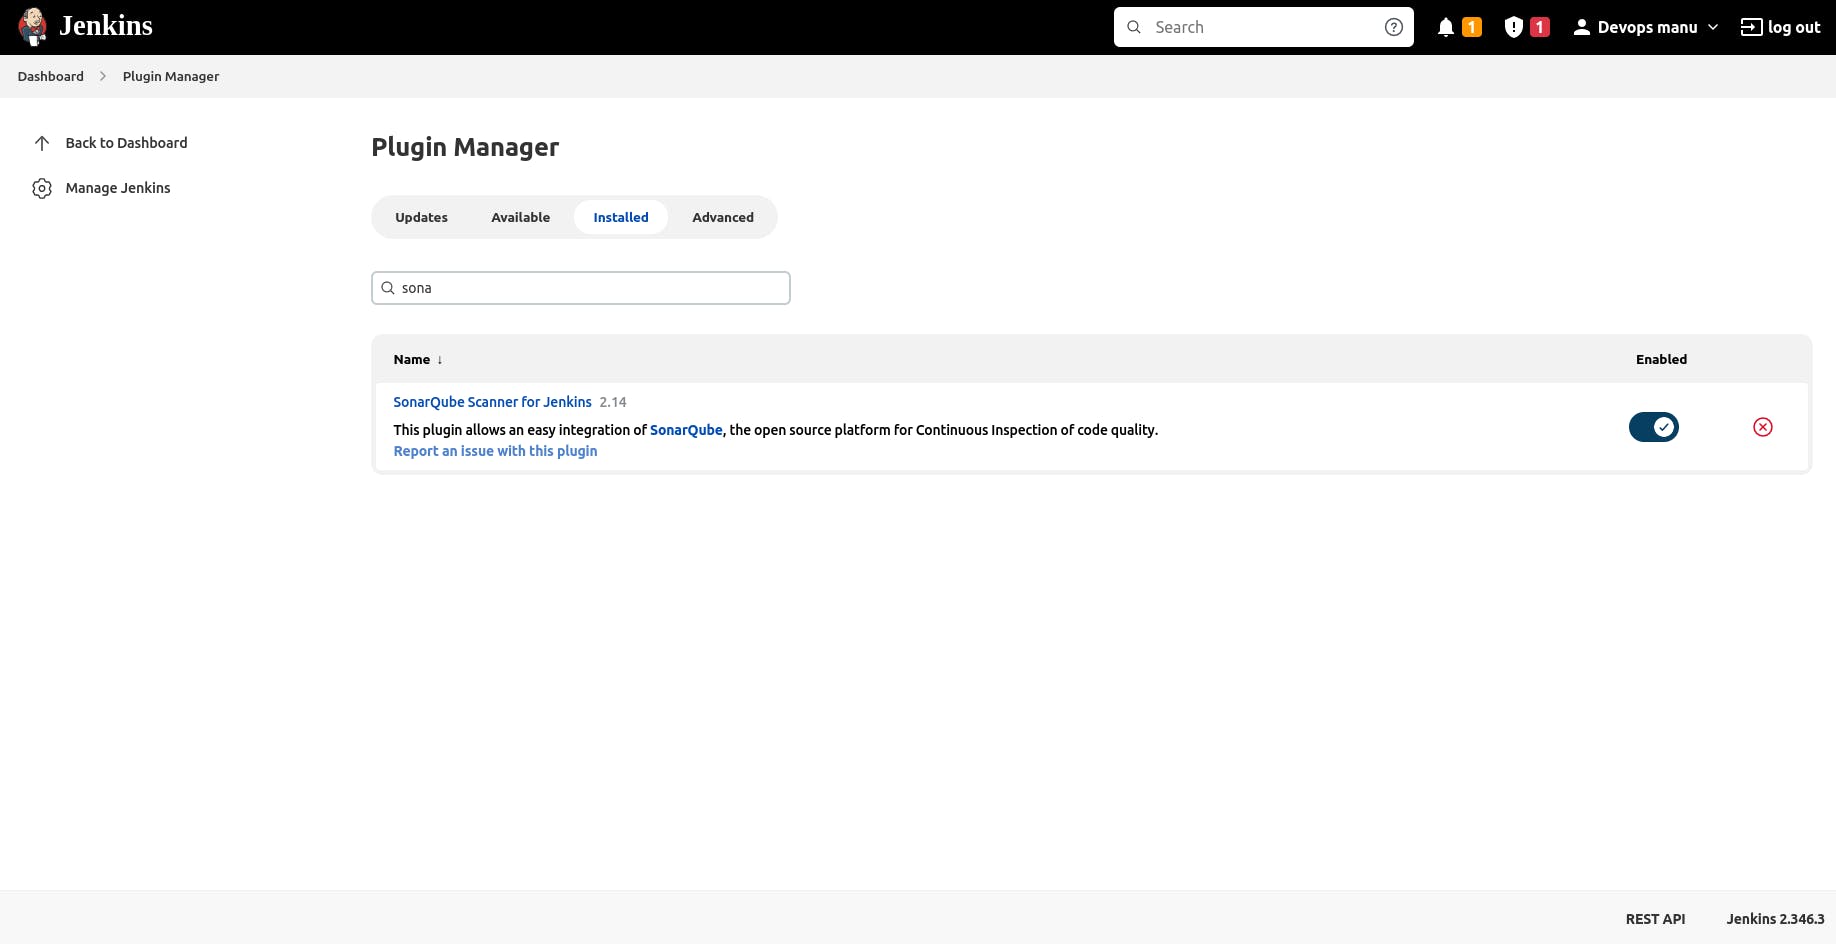
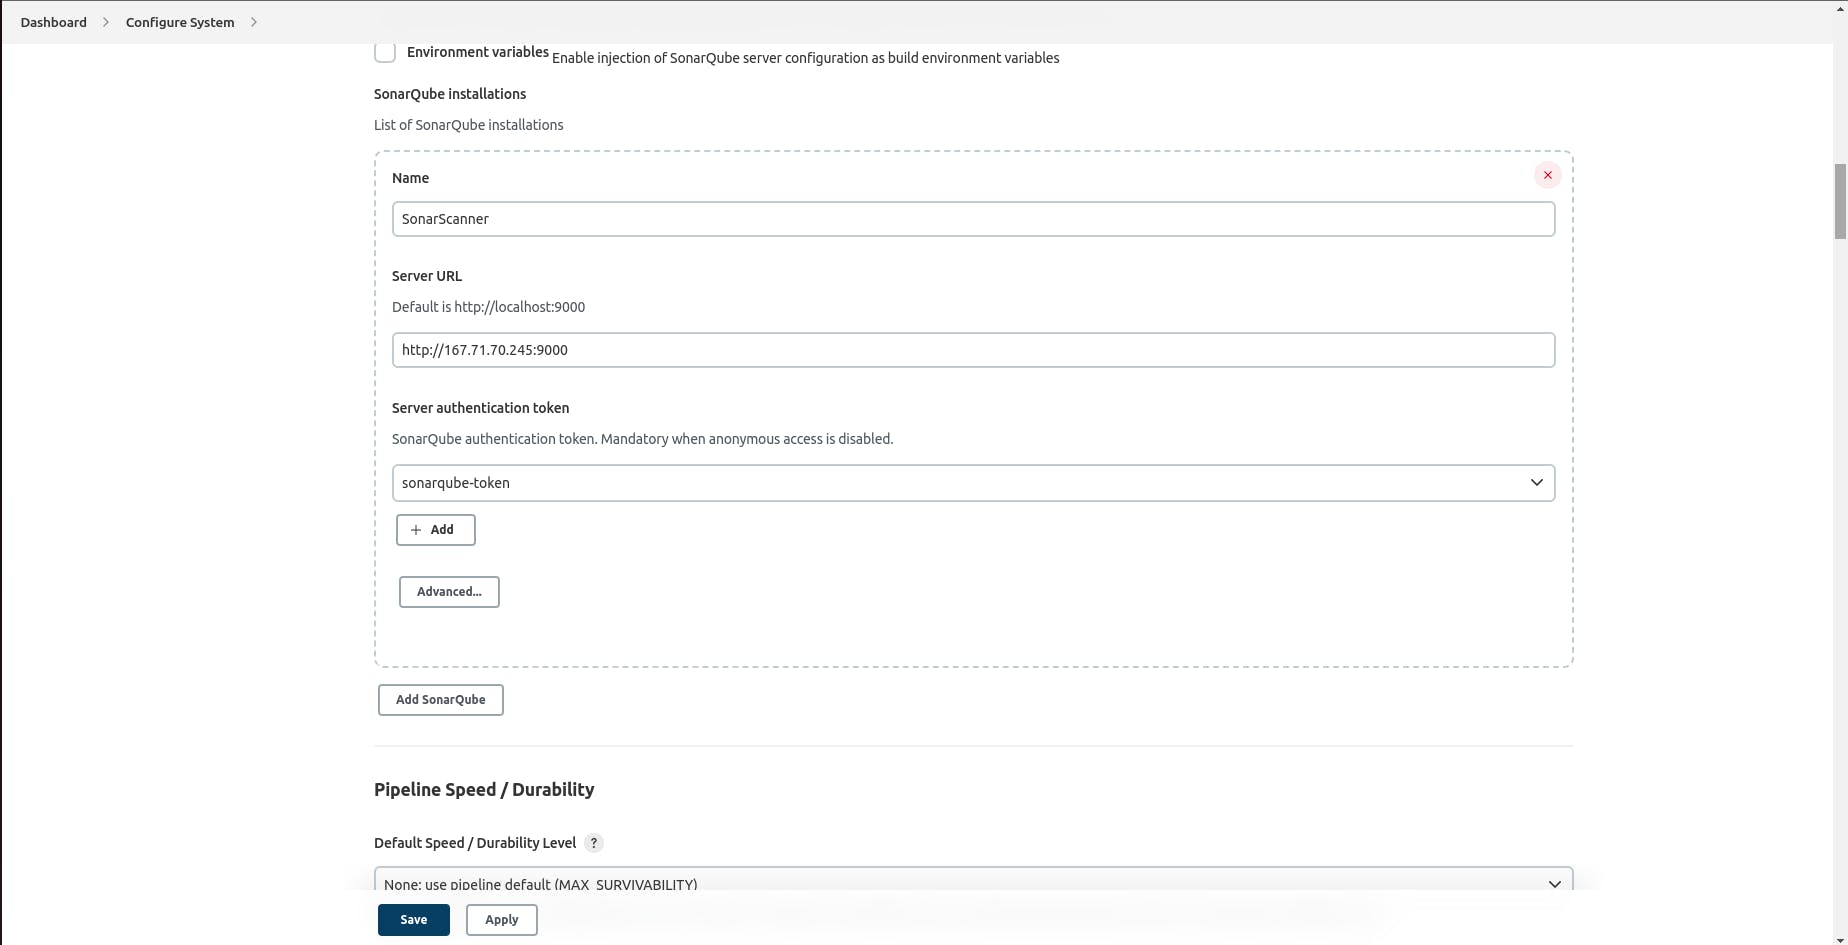
After a successful installation, head over to the manage Jenkins - configure systems and head over to the Sonarqube Servers part and configure it as shown in the pic below.
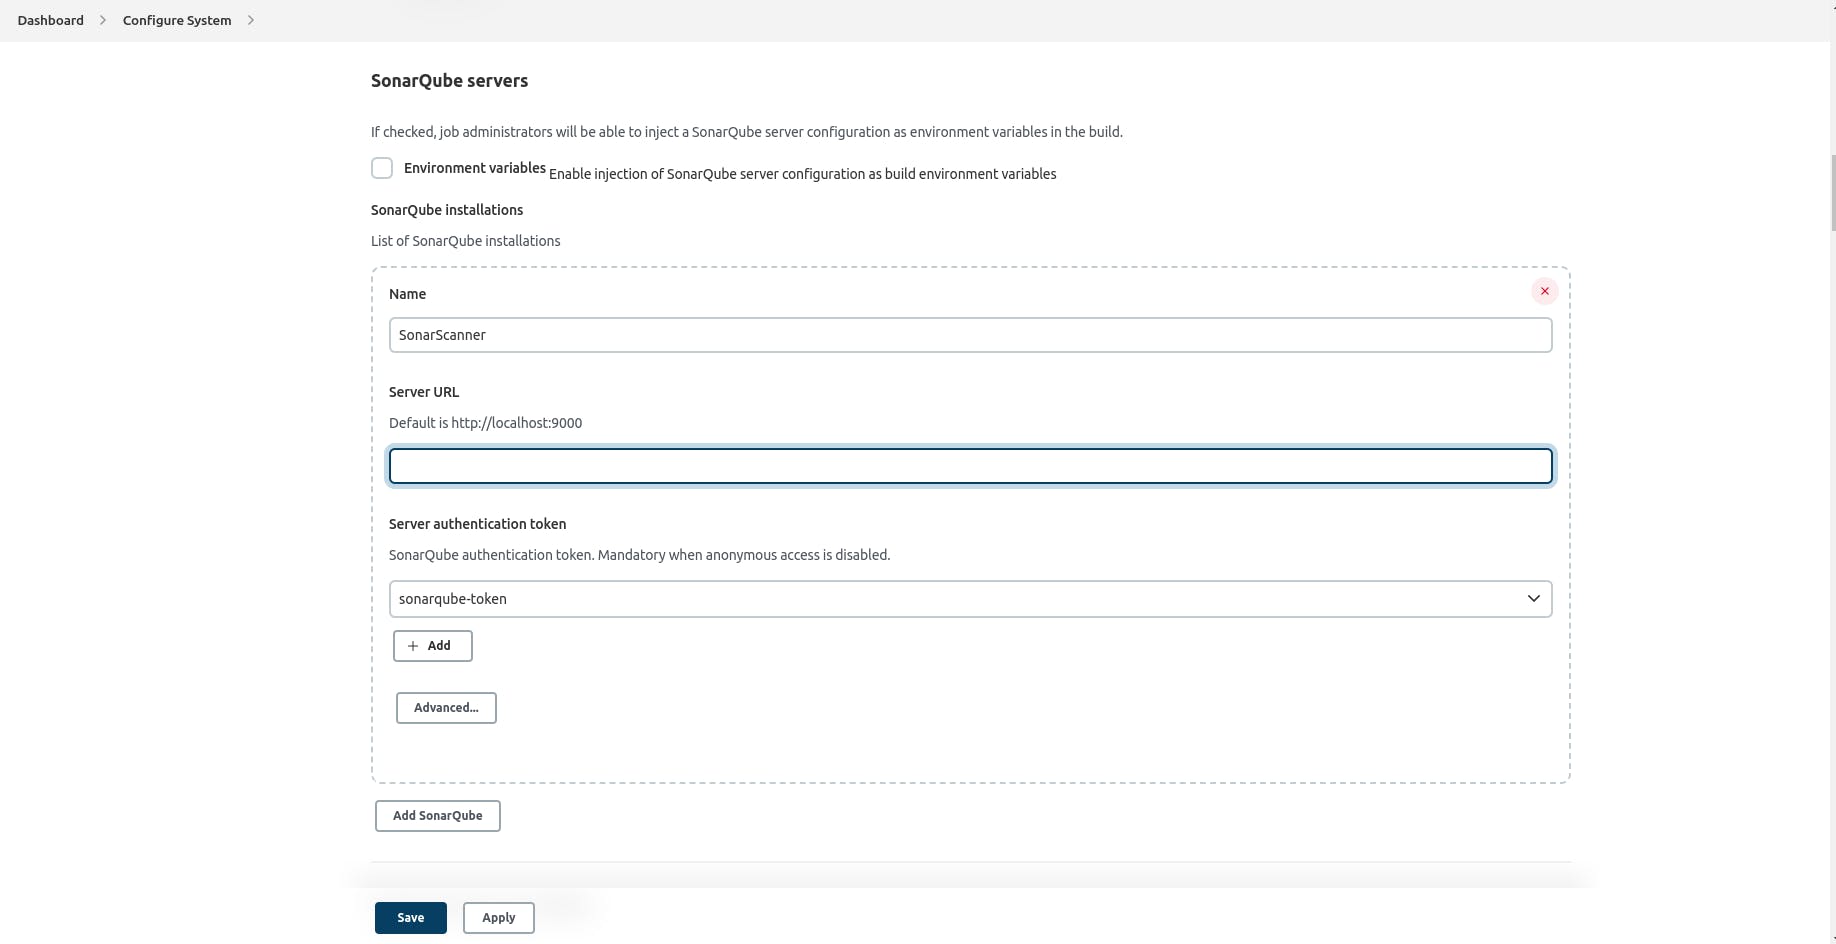
Kindly ensure that you have created a token in Sonarqube by going to the My Account -> Security part and have added the token in Jenkins as a credential.
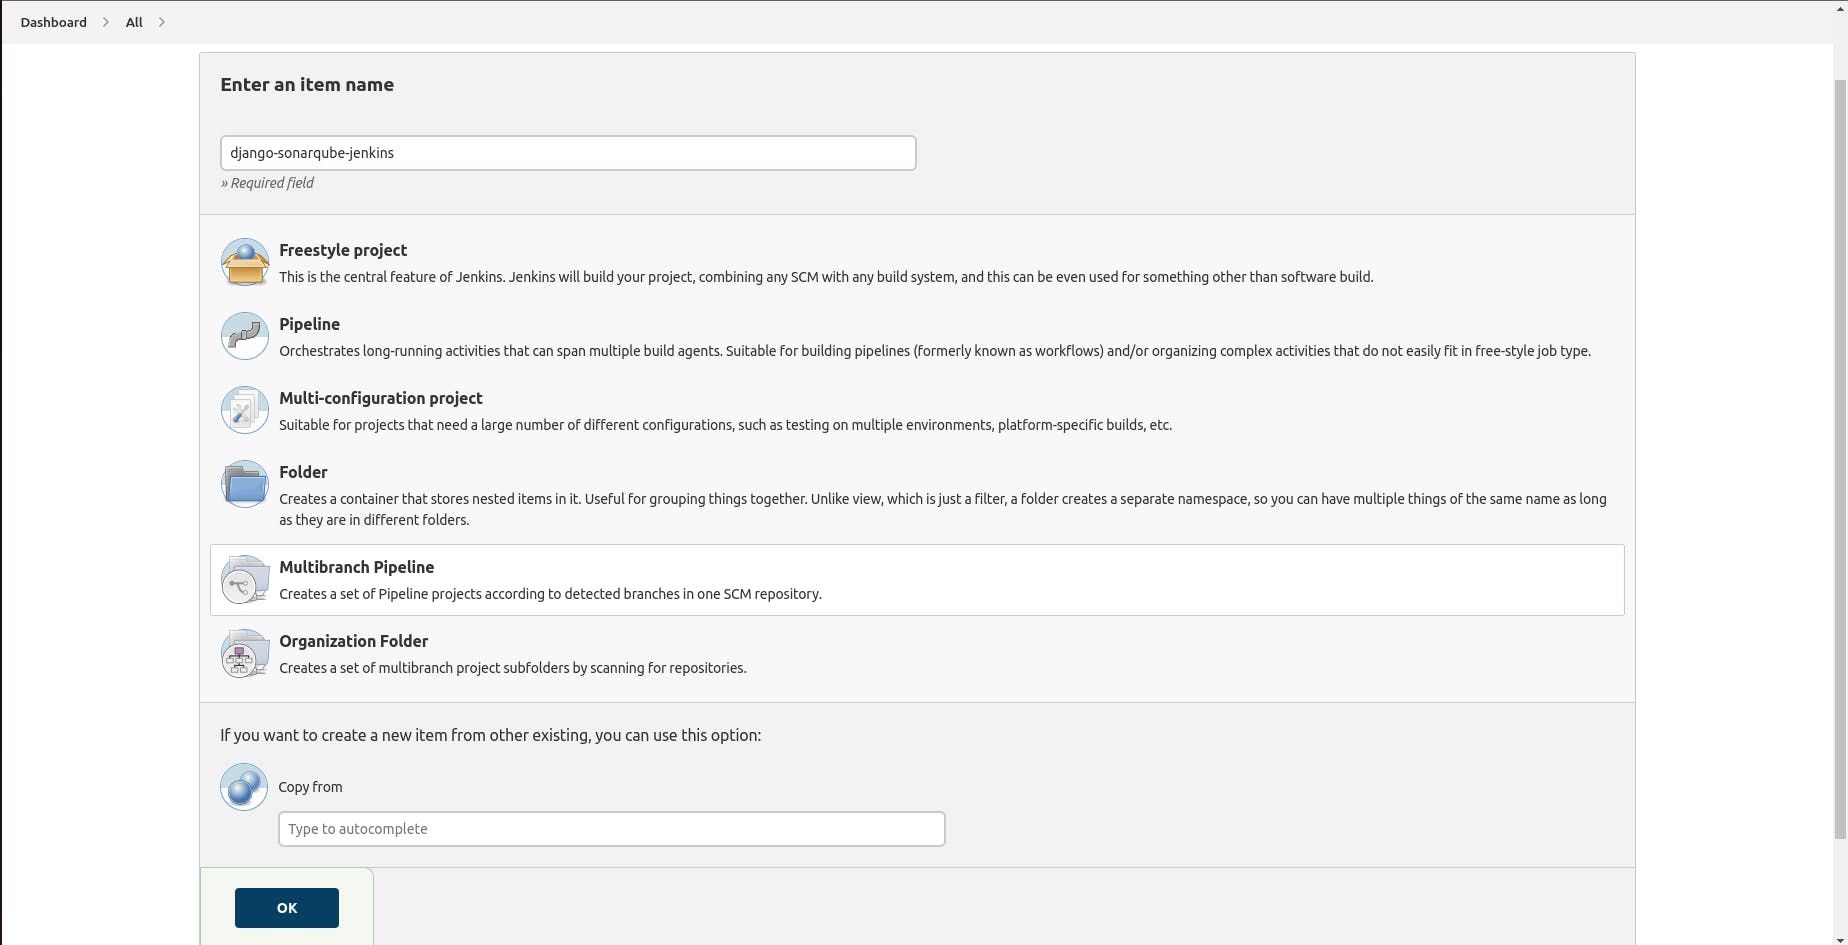
3. Create a multi-branch pipeline and configure it for Django.
Head over to your Jenkins Dashboard and click on the New Icon tab. You will be redirected to this page, input the job name and select the multi-branch job option.
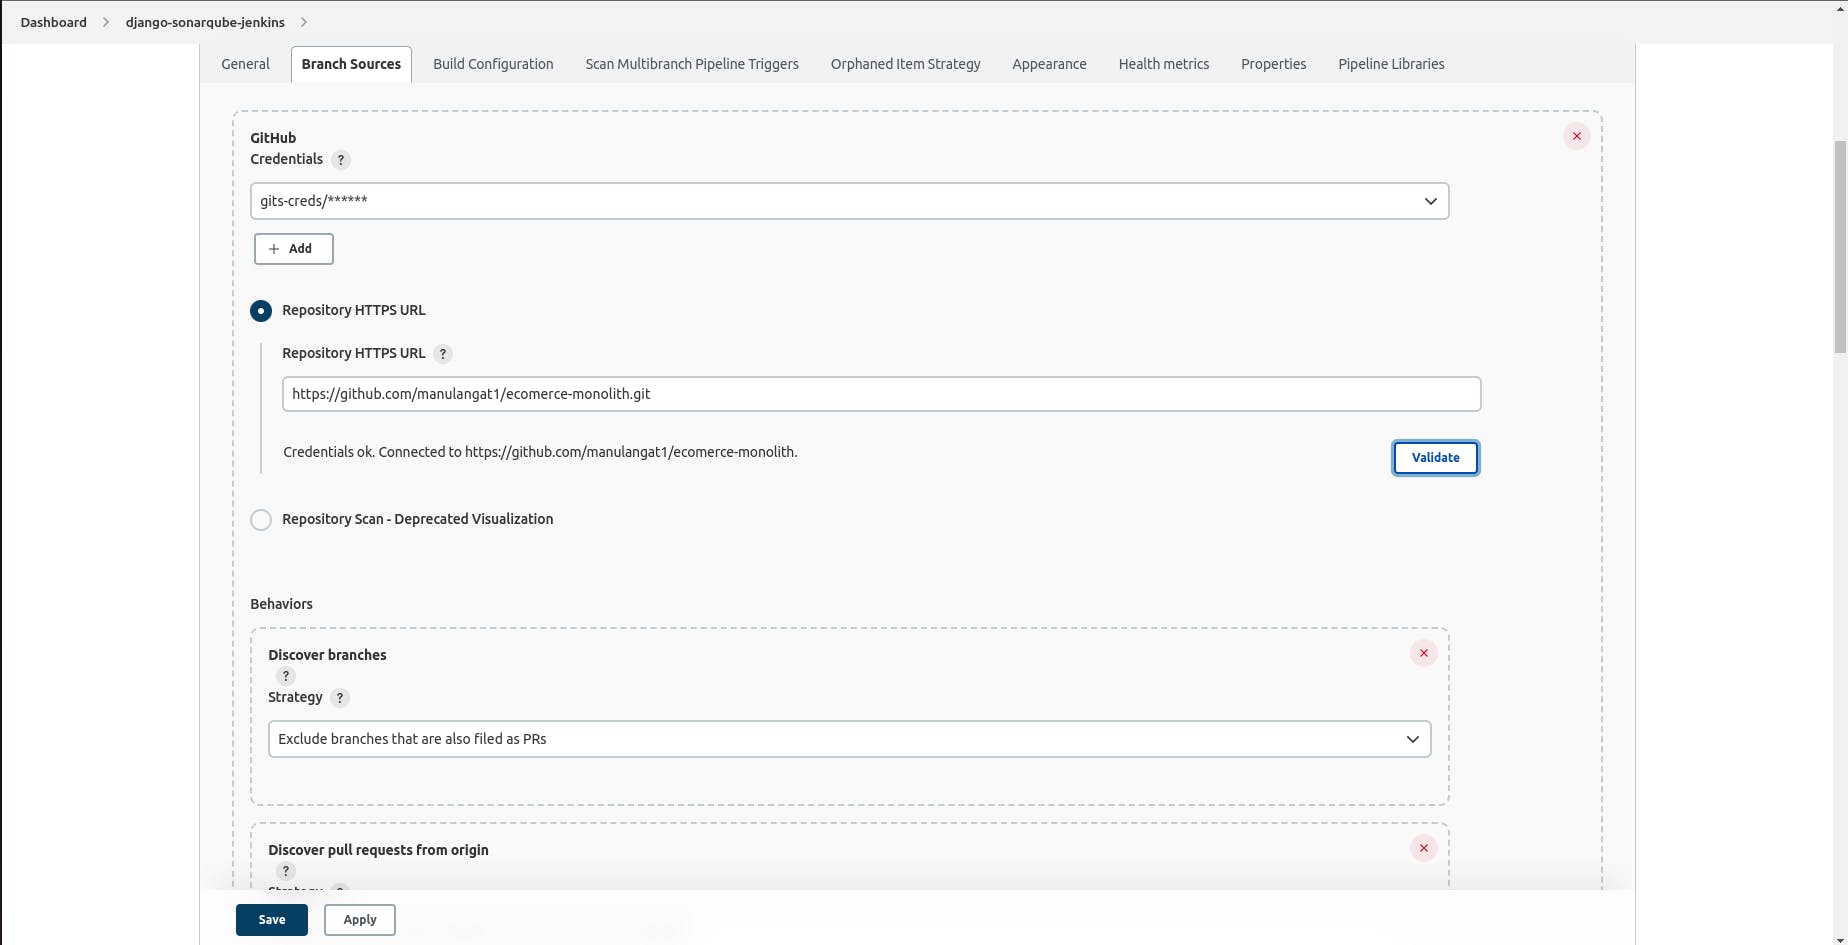
On successful creation, head over to the configure section -> branch sources and set the source as GitHub. Now add in your GitHub credentials previous added and the remote branch.
You can now head over to your project and add the following code in the JenkinsFile.
#! env/bin/groovy
def version
// def newVersion
pipeline {
    agent any
    stages {
        stage("Init the application") {
            steps {
                script {
                    echo "Hello there, ${BRANCH_NAME}"
                }
            }
        }

        stage("Create a virtual enviroment") {
            steps{
                script{
                    echo "Now creating a virtualenv"
                    sh "python3 -m virtualenv venv"
                    sh "chmod +x venv/"
                    sh "ls"
                    sh ". venv/bin/activate"
                }
            }
        }
        stage("Read the current version of the application") {
            steps {
                script {
                    echo" build number ${BUILD_NUMBER}"
                    def matcher = readFile("__init__.py") =~  "version = (.+)"
                    echo "${matcher[0][1]}"
                    version = matcher[0][1]
                }
            }
        }
        stage("Test stage") {
            steps {
                script{
                    echo "now what"
                    // sh "pytest"
                }
            }
        }
        stage("Build") {
            steps {
                script{
                    echo "now what"

                    withCredentials([usernamePassword(credentialsId:'dockerhub-id', usernameVariable:"USER" , passwordVariable:"PASS")]) {
                        // sh " echo ${PASS} | docker login -u $USER --stdin-"
                        sh '''
                    docker system prune -a -f
                    docker-compose -f docker-compose.yaml down
                    docker-compose -f docker-compose.yaml up --build   -d
                    echo $PASS | docker login -u $USER --password-stdin
                    docker push manulangat/django-ecomerce-monolith
                    '''

                    }

                }
            }
        }

        stage('Commit the version and tag'){
            steps {
                script {

                    echo" build number ${BUILD_NUMBER}"
                    def matchers = readFile("__init__.py") =~  "version = (.+)"
                    echo "${matchers[0][1]}"

                    def vers = matchers[0][1]
                    echo "${vers}"
                    matchers = null
                    // def newVersion = matchers[0][1]
                    // echo "${newVersion}"
                    // sh "docker-compose -f docker-compose.yaml down"
// now
                    withCredentials([usernamePassword(credentialsId:"github-creds-hook", usernameVariable:'USER', passwordVariable:'PASS')]) {
                        sh '''
                        chmod +x venv/
                        . venv/bin/activate
                        pip install -r requirements.txt

                        git config --global user.name jenkins
                        git config --global user.email jenkins@jobs.com
                        git status
                        git config --list
                        git remote set-url origin https://$USER:$PASS@github.com/manulangat1/ecomerce-monolith.git
                        git push --tags -f
                        git tag | xargs git tag -d
                        chmod +x README.md
                        chmod +x __init__.py
                        chmod +x setup.py
                        chmod +x CHANGELOG.md
                        bump2version  minor --allow-dirty
                        git describe --always
                        git push --tags -f
                        git tag | xargs git tag -d


                        '''
                        echo "Done pushing to github"
                    }
                }
            }
        }
    }

}
You can now connect the sonarqube server to the Jenkins server by going to the Jenkins dashboard and configure systems and head over to the Sonarqube installations part and fill in the required data.
You can now add the stage to run sast analysis using sonarqube
stage('SonarQube Analysis') {
                steps {
                    script {
                        def scannerHome = tool 'SonarScanner';
                            withSonarQubeEnv() {
                            sh "${scannerHome}/bin/sonar-scanner"
                            }
                    }
                }
            }
At this stage, your JenkinsFile should resemble the one below.
#! env/bin/groovy
def version
// def newVersion
pipeline {
    agent any
    stages {
        stage("Init the application") {
            steps {
                script {
                    echo "Hello there, ${BRANCH_NAME}"
                }
            }
        }
        stage('SonarQube Analysis') {
                steps {
                    script {
                        def scannerHome = tool 'SonarScanner';
                            withSonarQubeEnv() {
                            sh "${scannerHome}/bin/sonar-scanner"
                            }
                    }
                }
            }
        stage("Create a virtual enviroment") {
            steps{
                script{
                    echo "Now creating a virtualenv"
                    sh "python3 -m virtualenv venv"
                    sh "chmod +x venv/"
                    sh "ls"
                    sh ". venv/bin/activate"
                }
            }
        }
        stage("Read the current version of the application") {
            steps {
                script {
                    echo" build number ${BUILD_NUMBER}"
                    def matcher = readFile("__init__.py") =~  "version = (.+)"
                    echo "${matcher[0][1]}"
                    version = matcher[0][1]
                }
            }
        }
        stage("Test stage") {
            steps {
                script{
                    echo "now what"
                    // sh "pytest"
                }
            }
        }
        stage("Build") {
            steps {
                script{
                    echo "now what"

                    withCredentials([usernamePassword(credentialsId:'dockerhub-id', usernameVariable:"USER" , passwordVariable:"PASS")]) {
                        // sh " echo ${PASS} | docker login -u $USER --stdin-"
                        sh '''
                    docker system prune -a -f
                    docker-compose -f docker-compose.yaml down
                    docker-compose -f docker-compose.yaml up --build   -d
                    echo $PASS | docker login -u $USER --password-stdin
                    docker push manulangat/django-ecomerce-monolith
                    '''

                    }

                }
            }
        }

        stage('Commit the version and tag'){
            steps {
                script {

                    echo" build number ${BUILD_NUMBER}"
                    def matchers = readFile("__init__.py") =~  "version = (.+)"
                    echo "${matchers[0][1]}"

                    def vers = matchers[0][1]
                    echo "${vers}"
                    matchers = null
                    // def newVersion = matchers[0][1]
                    // echo "${newVersion}"
                    // sh "docker-compose -f docker-compose.yaml down"
// now
                    withCredentials([usernamePassword(credentialsId:"github-creds-hook", usernameVariable:'USER', passwordVariable:'PASS')]) {
                        sh '''
                        chmod +x venv/
                        . venv/bin/activate
                        pip install -r requirements.txt

                        git config --global user.name jenkins
                        git config --global user.email jenkins@jobs.com
                        git status
                        git config --list
                        git remote set-url origin https://$USER:$PASS@github.com/manulangat1/ecomerce-monolith.git
                        git push --tags -f
                        git tag | xargs git tag -d
                        chmod +x README.md
                        chmod +x __init__.py
                        chmod +x setup.py
                        chmod +x CHANGELOG.md
                        bump2version  minor --allow-dirty
                        git describe --always
                        git push --tags -f
                        git tag | xargs git tag -d


                        '''
                        echo "Done pushing to github"
                    }
                }
            }
        }
    }

}
Now push your code to GitHub and head over to your Jenkins Dashboard and navigate to the multi-branch job created earlier and click on the Build now button to start a new build. Your pipeline should run as expected
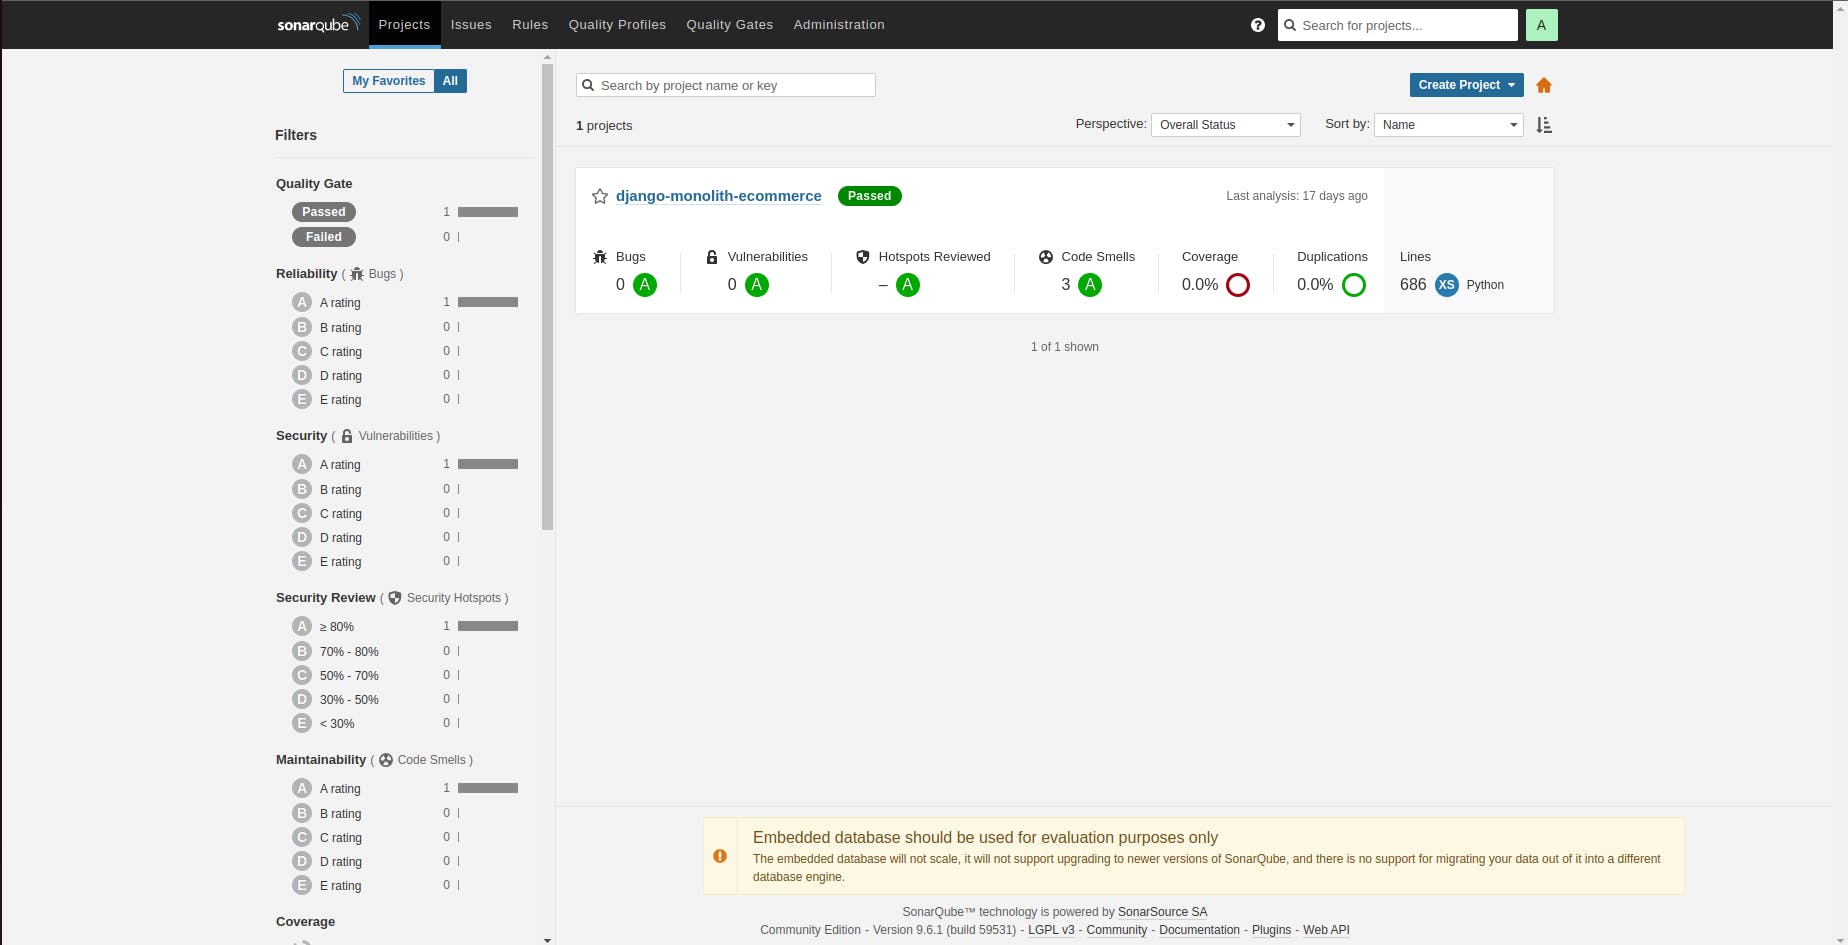
Navigate to your sonarqube server and on the dashboard, you should see your latest build as shown in the image below. You can go through it to understand how your code compares against several metrics.
4. Intergrate Email sending functionality.
Email integrations into the pipeline will help in sending alerts when specific actions occur. This can be achieved by:
4.1 Install the email extension library
Head over to your Jenkins dashboard -> manage plugins section and install the Email Extension plugin
4.2 Configuring email extension Library
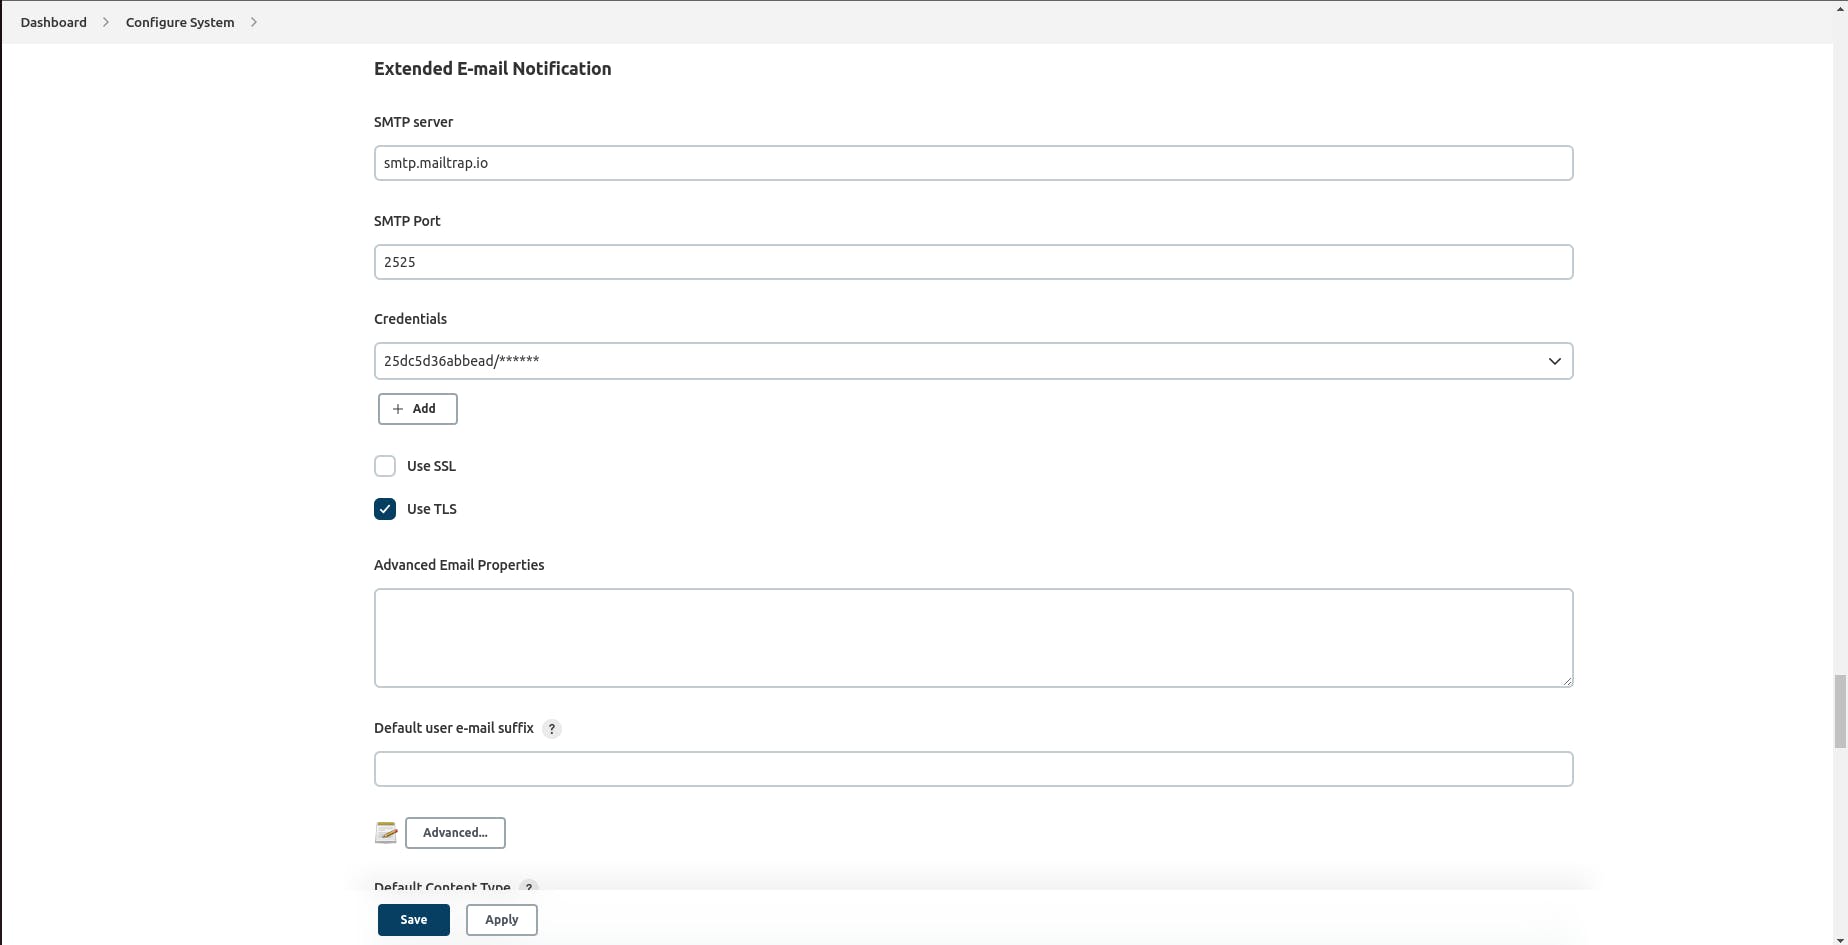
After successful installation, go to the configure system and scroll down to the extended email part and set up your SMTP servers.
Once that is done, head to your JenkinsFile and add the following block after all the stages.
    post{
    always {
        sh '''
        docker system prune -a -f
        docker-compose -f docker-compose.yaml down
        rm -rf venv
        '''
        emailext body: "$JOB_NAME - Build # $BUILD_NUMBER - :Check console output at $BUILD_URL to view the results.", recipientProviders: [[$class: 'DevelopersRecipientProvider'], [$class: 'RequesterRecipientProvider']], subject: 'Test'
    }
    failure {
        echo "oops sth failed"
    }
}
This step shuts down our docker containers and sends an email about the build. Commit and push your code to GitHub and head over to Jenkins to trigger a build. You should receive an email about the build details.
In this article, we have gone through setting up Jenkins, Sonarqube and email integration and how they work together in a pipeline. In the next article, we shall look at how to set up slack notifications in the pipeline and how to integrate dast (dynamic application software testing) in the pipeline.
Happy hacking