


Deploying Django using Kubernetes - a gentle intro.
Learn how to use Kubernetes to deploy and scale Django applications. This is the first part of the Kubernetes series


1. What is Kubernetes?
Kubernetes is an open-source container orchestration tool developed by Google. Kubernetes offers the following features:
High availability
Scalability or high performance.
Disaster recovery (backups and restore)
To get an in-depth understanding of what Kubernetes is and the problem it solves, read the official guide
To install Kubernetes in your preferred operating system, follow the guides on the
official documentation
2. A brief intro to services will be covered in this article.
In this article, you will learn about the following Kubernetes components:
2.1 Pods.
A pod is the smallest unit of Kubernetes. It provides an abstraction over a container and helps you to interact only with the Kubernetes layer and is usually meant to run one container per pod this is because the pods are scaled up and down as a single unit regardless of a container need thus resulting in expensive cloud costs.
Each pod gets allocated an IP address upon creation and they use the IP address to communicate. Pods are ephemeral and can die easily thus the need for services
2.2 Services and Ingress.
A service is a static IP address that can be attached to the pods and is not connected to the lifecycle of a Pod thus when a pod dies and is recreated. There are various types of services namely:
ClusterIP service - is the default type of service and is used to expose a service on an Ip internal to the cluster. Access is only permitted to objects with the cluster.
HeadlessIp Service
Nodeport Service
LoadBalancer Service
2.3 ConfigMaps and Secrets.
ConfigMap contains the external configuration of your application both are local volumes but are rather own components.
Secret - used to store credentials and it is stored in base64 format. used for individual key-value pairs or for mounting files.
2.4 Deployments.
Is an abstraction over the pod's blueprint for creating pods. In practice, you will be creating deployments and not pods since it provides an avenue to scale up and down.
2.5 Volumes.
It is useful when persisting data in k8s for pod restart and does not depend on the pod lifecycle Should be available on all nodes. Highly available that survives even if cluster crashes
My SQL - data gets added, updated but once you restart a pod the data goes as k8s and does not
We will briefly cover the 3 classes of Kubernetes volumes
- Persistent Volume
a cluster resource
created via a YAML file.
Takes storage from physical storage eg local storage, NFS server etc
decide what type and manage them eg backups etc
They are not namespaced. local vs remote volume types: local volume violates
being tied to 1 specific node.
surviving cluster crashes
For DB persistence, always use remote storage.
- Persistent Volume Claim.
Admin configures storages (create and configure).
Admin creates PV from these storage backends.
App claim volumes and also created using YAML files. must exist in the same ns as the PVC
do not care where your storage is,
Easier for developers.
Pod -> PVC -> CLaim
- Storage class. provisions persistent volumes dynamically whenever PVC claims it. created via a YAML class claimed by PVC - add a storage class Name
2.6 Namespaces.
Namespaces can be thought of as a virtual cluster inside a cluster. It is used to isolate resources/ clusters together.
- It is important to note that you cannot access most of the resources from another namespace eg if you have a config map in project A ns, you cannot use that configmap in project B namespace but instead, you have to create the same in the other project. However, a service can be referenced in another project. To get a list of all components that can be namespace run
kubectl api-resources --name-spaced=true
- Volumes are accessible throughout the cluster To get a list of all non-namespaces components run
kubectl api-resources --name-spaced=false
This brings up the question, why use namespaces?
Group resources into namespaces eg DB ns, monitoring ns, Nginx ingress ns
Many teams are using the same application - one team can easily overwrite another team's work. Each team can work independently
Resource sharing - staging and development environments.
When you use blue-green deployment for your application.
Access and Resource limits on Namespaces, 2 teams - give the team access to their own ns and define resource quotas.
By default, K8s has the following namespaces defined.
Kubernetes-dashboard - This
nsis shipped only with minikube and you will not have this in a normal cluster.kube-system - Not meant for your use. Components deployed here include the system processes,
Kube-public - Has a config map that contains cluster information and which is accessible without auth. Type
kubectl cluster infoon your terminal and you should see info about your minikube installation.kube-node-list - Holds info about the heartbeats of every node and determines the availability of nodes.
Default namespace - Used to create a new namespace at the beginning.
To get a list of all the namespaces run
kubectl get namespace
You can use a CLI command as shown below or via a namespace configuration file.
Via a CLI(command line ) command
kubectl create namespace my-namespace
And you can now assign the created namespace to a Kubernetes namespace as:
apiVersion: v1
kind: ConfigMap
metadata:
  name: my-configmap
  name: my-namspace
To switch over your namespaces, install kubens as detailed in this GitHub
2.6 Sample YAML configuration file.
In this part, you will learn the basic syntax of a Kubernetes YAML file and how it is usually structured.
The main parts of a YAML file include:
Metadata. - Contains the metadata of the file eg name and others such as labels.
Specification - specific to the kind you are creating.
Status- automatically generated and added by K8s. This is the basis of the self-healing nature of k8s eg you have specified you need 2 replicas and if one dies, it will look at the status for the desired state and spin up a new pod.
Attached below is a simple k8s YAML file of kind Deployment
apiVersion: apps/v1
kind: Deployment
metadata:
  name: name-of-deployment
  labels:
    app: name #should be the same with labels in the template
spec:
  replicas: 2
  selector:
    matchLabels:
      app: name
  template: # blue print of a pod
    metadata:
      labels:
        app: name
    spec:
      containers:
        - name:  container-name
          image: image-name-ref
          imagePullPolicy: Always
3. Django app that will be used (Optional).
For the demonstration, the following application will be used
ecommerce monolith. Navigate to your desired folder ie
cd Desktop
Clone the application by using the following command.
git clone https://github.com/manulangat1/ecomerce-monolith.git
Once the cloning is done navigate into the cloned directory and change into a new branch.
git switch -f "feat-h8s-test-your-name"
N/B. This step is optional and you can use any of your code repositories to follow along with this tutorial.
4. Deployments and services set up.
4.1 Deployment file
On the root of your project, create a folder named k8s and navigate inside the newly created folder
mkidr k8s
Navigate into the created k8s folder
cd k8s
Create a file named django-deployment.yaml
touch django-deployment.yaml
Once created, add the following lines of code.
apiVersion: apps/v1
kind: Deployment
metadata:
  name: django-be-deployment
  labels:
    app: django-be #should be same with labels in template
spec:
  replicas: 1
  selector:
    matchLabels:
      app: django-be
  template: # blue print of a pod
    metadata:
      labels:
        app: django-be
    spec:
      containers:
        - name: django-be
          image: manulangat/django-ecomerce-monolith
          imagePullPolicy: Always
          command: ["gunicorn"]
          args: ["--bind=localhost:8000","monolithEcommerce.wsgi:application"]
          ports:
            - containerPort: 8000
Run the following command at the project root to apply the changes we have added.
kubectl apply -f django-deployment.yaml
To get the pod details of the app and to get the progress, run the following command.
kubectl get pod | grep django
It should have a similar output as the one shown below, kindly note that the container creation process may take some bit of time when the command is run initially.

To get the logs of the deployment created initially run
kubectl logs -f deployment/django-deployment
and the output should be similar to the image shown below if you are using the base project shared above.

4.2 Secrets set up.
Now that our deployment service is up and running, we may need to pass some environment variables such as the Django-secret key that should be hidden from the public, this is better done through the use of secrets and thus the need for the secrets file. Note that values stored in Secretes should be base64 encoded
While on the project root, create a new file inside the k8s folder by
cd k8s
touch django-secrets.yaml
Once that is done, add the following lines of YAML code into the newly created django-secrets.yaml file. To get a base64 encoded value of your secret run the following command
echo -n "YOUR_SECRET_KEY" | base64
apiVersion: v1
kind: Secret
metadata:
  name: django-secrets
type: Opaque
data:
  DJANGO_SITE_SECRET_KEY: WU9VUl9TRUNSRVRfS0VZ
To apply and create the secret, run
kubectl apply -f k8s/django-secrets.yaml
To confirm whether the secret was created successfully, use the below command
kubectl get secrets | grep django
and the output should be similar to the image attached below

The next step is now accessing the secrets in our django deployment file. Head over to the `k8s/django-deployment.yaml` file and below the ports option add the following configurations to load the secret and access the value for the key DJANGO_SECRET_SITE_KEY.
env:
            - name: DJANGO_SITE_SECRET_KEY
              valueFrom:
                secretKeyRef:
                  name: django-secrets # name given to the secret in django-secrets.yaml file
                  key: DJANGO_SITE_SECRET_KEY
At this stage, your django-deployment.yaml the file should resemble this
apiVersion: apps/v1
kind: Deployment
metadata:
  name: django-be-deployment
  labels:
    app: django-be #should be same with labels in template
spec:
  replicas: 1
  selector:
    matchLabels:
      app: django-be
  template: # blue print of a pod
    metadata:
      labels:
        app: django-be
    spec:
      containers:
        - name: django-be
          image: <REF_OF_YOUR_IMAGE>
          imagePullPolicy: Always
          command: ["gunicorn"]
          args: ["--bind=localhost:8000", "monolithEcommerce.wsgi:application"] # replace monolithEcommerce with the name of your
          ports:
            - containerPort: 8000
          env:
            - name: DJANGO_SITE_SECRET_KEY
              valueFrom:
                secretKeyRef:
                  name: django-secrets # name given to the secret in django-secrets.yaml file
                  key: DJANGO_SITE_SECRET_KEY
At this stage, we have gone through Kubernetes deployments and secrets and tested it out via kubectl commands all is well, in the next step, we shall learn how to expose our application to the outside world through Kubernetes services.
4.3 Services- Exposing our django app to the outside world.
Create a new file in the k8s folder ie
touch k8s/django-service.yaml
And add the following pieces of yaml code inside it
apiVersion: v1
kind: Service
metadata:
  name: django-service
spec:
  selector:
    app: django-be # name of app as defined in the
  type: LoadBalancer # specifies the type of service  created.
  ports:
    - protocol: TCP
      port: 1338
      targetPort: 8000
      nodePort: 30001
Run the commands below to apply our changes and to confirm whether everything works as expected. The output of the second command should be similar to the image attached below

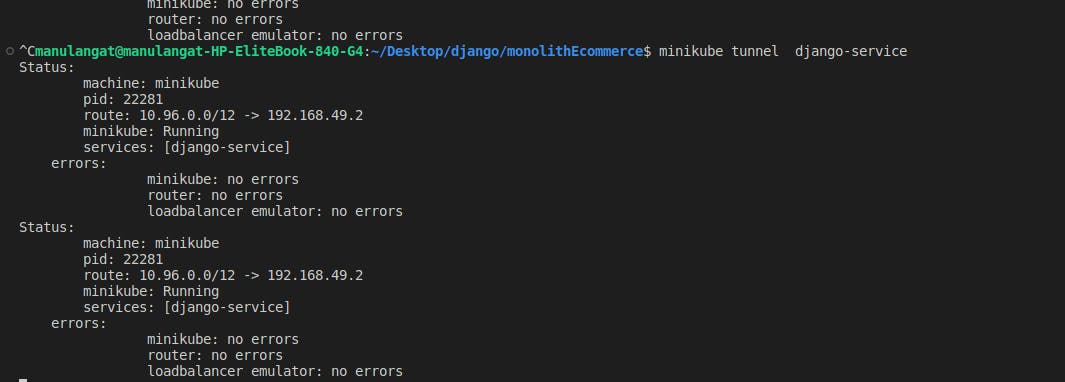
The service can now be exposed via `minikube tunnel command `. Head to your terminal and paste in the following :
minikube tunnel NAME_OF_YOUR_SERVICE
It will prompt you to input your password and once done, it will show the logs similar to the one in the picture attached below.
To access the application, get the IP address stated above and navigate to it ie
192.168.49.2:30000/
In this article, we have gone through the basics of Kubernetes and how to use components such as Deployments, services and secrets in our Django app. In the next article in this series, you will learn about using volumes, exposing our app using ingress and deploying it to a digital ocean-managed Kubernetes service.
Happy hacking!!