


Photo by RetroSupply on Unsplash
Create and use custom Django signals by building a blog application
In this article, you will learn how to create and use custom Django signals. Then use them to log all actions undertaken by a user on the application


In this article, you will learn how to create and use custom Django signals. Then use them to log all actions undertaken by a user on the application
1. What are Django signals?
According to the Django documentation, a signal is In a nutshell, signals allow certain senders to notify a set of receivers that some action has taken place. They’re especially useful when many pieces of code may be interested in the same events.
There are various built-in signals that you can read comprehensively here. However, for the scope of this project, you shall learn about creating custom signals.
2. Set up a new Django project.
2.1 Navigate into your desired folder and create a virtual environment.
Navigate to your desired folder, e.g Downloads and create and activate a virtual environment.
cd Desktop
create a folder that will house the Django project
mkdir audit-logs-app && cd audit-logs-app
create and activate a virtual environment
python3 -m virtualenv venv
Activate the virtual environment
source venv/bin/activate # if you are using a Linux distro
.\venv\Scripts\activate # if running on windows
2.2 Install Django and create project
You can now install Django
pip install django
Create a new Django project
django-admin startproject djangoauditlog
Navigate into the django project. This is where we will create our apps and write the code.
cd djangoauditlog
3. Create django apps (authentication and posts)
3.1 Create an authentication app and install drf and django-rest-knox
django-admin startapp authentication
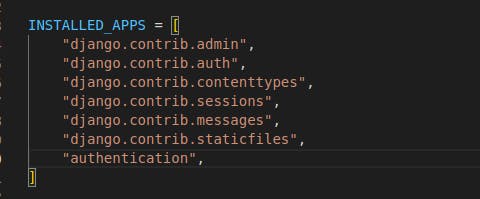
Head over to your settings.py file and add the authentication app to the list of INSTALLED_APPS as shown below.
Now that is done install django rest framework and django-rest-knox by
pip install djangorestframework django-rest-knox
After a successful installation head over to your settings.py file and add the rest_framework and knox to the list of INSTALLED_APPS as shown below.
Still on the settings.py file, add the following lines of code which tells rest_framework the authentication classes that is should use.
REST_FRAMEWORK = {
    "DEFAULT_AUTHENTICATION_CLASSES": (
        "knox.auth.TokenAuthentication",
        "rest_framework.authentication.TokenAuthentication",
        "rest_framework.authentication.SessionAuthentication",
        "rest_framework.authentication.BasicAuthentication",
    ),
    # 'DEFAULT_FILTER_BACKENDS': ('django_filters.rest_framework.DjangoFilterBackend',)
}
3.2 Create a custom User model.
We will create a custom user model using the AbstractUser abstract class. Head to the apps/authentication/models.py and add the following code.
from django.db import models
from django.contrib.auth.models import AbstractUser
from django.utils import translation

#local imports
#from apps.common.models import TimeStampedModel
# Create your models here.

class User(AbstractUser):
    bio = models.TextField(verbose_name='user bio', null=True, blank=True)

    def __str__(self) -> str:
        return self.email
3.3 Create your auth serializer files.
Head over to the apps/authentication/serializers.py file and add the following lines of code.
from rest_framework import serializers


#django imports
from django.contrib.auth import get_user_model, authenticate
#local imports
from apps.authentication.models import Profile


# instantiate our user model
User = get_user_model()

class UserSerializer(serializers.ModelSerializer):

    class Meta:
        model = User
        fields = (
            "id",
            "username",
            "email",
            "first_name",
            "last_name"
        )

class ProfileSerializer(serializers.ModelSerializer):
    username =  serializers.CharField(source="user.username")
    class Meta:
        model = Profile
        fields = (
            "username",
            "city",
            "state",
            "country"
        )


class RegisterSerializer(serializers.ModelSerializer):
    class Meta:
        model = User
        fields = ('id', 'username', 'email', 'password')
        extra_kwargs = {'password': {'write_only': True}}

    def create(self, validated_data):
        user = User.objects.create_user(validated_data['username'], validated_data['email'], validated_data['password'])
        return user

class LoginSerializer(serializers.Serializer):
    username = serializers.CharField()
    password = serializers.CharField()

    def validate(self, data):
        user = authenticate(**data)
        if user and user.is_active:
            return user
        raise serializers.ValidationError('Incorrect Credentials Passed.')
3.4 Create auth API endpoints.
Head over to the apps/authentication/views.py file and add the following lines of code.
from django.shortcuts import render
from rest_framework import views, generics, permissions, status
from rest_framework.response import Response

#local imports
from apps.authentication.serializers import  UserSerializer, RegisterSerializer, LoginSerializer

from apps.authentication.exceptions import ProfileNotFound
# third party imports
from knox.models import AuthToken

# Create your views here.

class RegisterAPI(generics.GenericAPIView):
    serializer_class = RegisterSerializer
    def post(self, request):
        serializer = self.get_serializer(data=request.data)
        serializer.is_valid(raise_exception=True)
        user = serializer.save()
        print(user)
        user.save()
        token = AuthToken.objects.create(user)
        return Response({
            "users": UserSerializer(user, context=self.get_serializer_context()).data,
            "token": token[1]
        }, status=status.HTTP_200_OK)

class LoginAPI(generics.GenericAPIView):
    serializer_class = LoginSerializer

    def post(self,request):
        serializer = self.get_serializer(data=request.data)
        serializer.is_valid(raise_exception=True)
        user = serializer.validated_data
        token = AuthToken.objects.create(user)
        return Response({
            "users": UserSerializer(user, context=self.get_serializer_context()).data,
            "token": token[1]
        }, status=status.HTTP_200_OK)

class UserAPI(generics.GenericAPIView):
    serializer_class = UserSerializer
    permission_classes = (
        permissions.IsAuthenticated,
    )
    def get(self,request):
        user = self.request.user
        serializer = UserSerializer(user)
        return Response(serializer.data, status=status.HTTP_200_OK)
3.5 Create the authentication URLs.
Head over to the apps/authentication folder and create a urls.py file if it did not exists. After successful creation, paste in the following lines of code.
from django.urls import path
from . import views
urlpatterns = [
    path('auth/register/', views.RegisterAPI.as_view(), name="registration_api"),
    path('auth/login/', views.LoginAPI.as_view(), name="login_api"),
    path('auth/me/', views.UserAPI.as_view(), name="get_logged_in_user_api"),
]
3.6 Testing out the authentication APIs
Head over to postman or the tool you use and test out the APIs one by one and confirm that all are working fine. Feel free to tweak the code as you wish to achieve your desired functionality.
4. Create the blog application and the custom signal.
4.1 Create the blog application using django-admin command.
django-admin startapp blog
Register the application in the installed apps in the INSTALLED_APPS section in your settings.py file.
4.2 Create the blog models.
Head over to your blog/models.py file and paste in the following lines of code.
from django.db import models
from django.contrib.auth import get_user_model

import uuid


# Create your models here.


User = get_user_model()

class TimeStampedUUIDModel(models.Model):
    pkid = models.BigAutoField(primary_key=True, editable=False)
    id = models.UUIDField(default=uuid.uuid4, editable=False, unique=True)
    created_at = models.DateTimeField(auto_now_add=True)
    updated_at = models.DateTimeField(auto_now=True)

    class Meta:
        abstract = True


class Tag(TimeStampedUUIDModel):
    title = models.CharField(max_length=199)

    def __str__(self) -> str:
        return self.title


class Post(TimeStampedUUIDModel):
    user = models.ForeignKey(User, related_name="posts",
                             on_delete=models.CASCADE)
    title = models.CharField(max_length=199)
    content = models.TextField()
    tags = models.ManyToManyField(Tag)
    isPublished = models.BooleanField(default=False)
    image = models.CharField(max_length=255, null=True)
    slug = models.CharField(max_length=255, null=True)

    def __str__(self) -> str:
        return self.title
You can now run your migrations by heading over to your terminal and using the commands.
python3 manage.py makemigrations
python3 manage.py migrate
4.3 Create the posts serializer.
At this point, you will handle the serializer classes that will help in converting the queryset objects to a JSON readable format.
Head over to blogs/serializers.py and paste in the following lines of code.
from rest_framework import serializers
from .models import Post, Tag


class TagSerializer(serializers.ModelSerializer):
    class Meta:
        model = Tag
        fields =  (
            "id",
            "title",
        )


class PostSerializer(serializers.ModelSerializer):
    class Meta:
        model = Post
        fields = (
            "id",
            "title",
            "content",
        )


class PostDetailSerializer(serializers.ModelSerializer):
    tags = serializers.SerializerMethodField()

    class Meta:
        model = Post
        fields = ("id", "title", "content", "tags")

    def get_tags(self, obj):
        return TagSerializer(obj.tags.all(), many=True).data
4.4 Blog application API endpoints. Create the views.
You will now create API endpoints, using django rest framework that will be used to communicate with the models (CRUD operations).
Head over to the blogs/views.py file and paste in the following lines of code.
from rest_framework import permissions, status, generics
from rest_framework.views import APIView
from rest_framework.response import Response


import requests
# Create your views here.

from .models import Post, Tag
from .serializers import TagSerializer, PostDetailSerializer, PostSerializer


class TagAPI(generics.ListCreateAPIView):
    serializer_class = TagSerializer
    queryset = Tag.objects.all().order_by("-created_at")
    permission_classes = [permissions.IsAuthenticated]


class PostAPI(generics.ListCreateAPIView):
    serializer_class = PostSerializer
    queryset = Post.objects.all().order_by("-created_at")
    permission_classes = (permissions.IsAuthenticated,)

    def perform_create(self, serializer):
        data = self.request.data
        new_post = serializer.save(
            user=self.request.user, title=data["title"], content=data["content"]
        )
        all_posts = Post.objects.all().order_by("-created_at")
        serializer = PostSerializer(all_posts, many=True)
        return Response(serializer.data, status=status.HTTP_201_CREATED)


class PostDetailAPI(APIView):
    def get(self, request, id):
        post = get_post(id)
        serializer = PostDetailSerializer(post)
        return Response(serializer.data, status=status.HTTP_200_OK)
With the views now in place, go ahead and create a new file blogs/urls.py and add the following lines of code.
from django.urls import path
from . import views


urlpatterns = [
    path("v1/posts/", views.PostAPI.as_view(), name="get_a_list_of_all_blogs"),
    path("v1/tags/", views.TagAPI.as_view(), name="get_all_tags"),
    path("v1/posts/<str:id>/", views.PostDetailAPI.as_view(), name="get_a_post_detail"),
]
4.5 Test out the blogs API endpoints.
Head over to postman / insomia based on your preferences and test out the blog api's one by one. If you face any issue , feel free to leave a comment or get in touch for more clarifications.
5. Implementing the audit logs functionality.
At this stage, you have both authentication and the blog features up and running, you can create, view, edit and delete posts, however, you cannot, as an admin / super user know who accessed what part of the system and the action that was undertaken. This drives us to implement the audit trail functionality.
5.1 Create the AuditTrail model.
On your blogs/models.py, add the audit trail model
class AuditTrail(TimeStampedUUIDModel):
    login_IP = models.GenericIPAddressField(null=True, blank=True)
    action_datetime = models.DateTimeField(auto_now=True)
    user = models.ForeignKey(User, on_delete=models.CASCADE) # keeps track of the user
    changed_object = models.CharField(max_length=40)
    event_category = models.CharField(max_length=40)
    user_agent_info = models.CharField(max_length=255)
    is_deleted = models.BooleanField(default=False)
    action = models.CharField(max_length=40)
    change_summary = models.CharField(max_length=199)
Run your migrations by using the commands to ensure we can start using the
python3 manage.py makemigrations
python3 manage.py migrate
5.2 Custom Signal implementation.
With the audit trail model in place, you can now go ahead and create the custom signal implementation that will be used to create the logs.
Go and create a new file blogs/signals.py file and add in the following piece of code.
import django.dispatch
from django.dispatch import receiver

from .models import AuditTrail
import logging
import datetime


audit_trail_signal = django.dispatch.Signal(providing_args=['user', 'request', 'model', 'event_category', 'method', 'summary']) # creates a custom signal and specifies the args required.

logger = logging.getLogger(__name__)

#helper func that gets the client ip
def get_client_ip(request):
    x_forwarded_for = request.META.get('HTTP_X_FORWARDED_FOR')
    if x_forwarded_for:
        ip = x_forwarded_for.split(',')[0]
    else:
        ip = request.META.get('REMOTE_ADDR')
    return ip

@receiver(audit_trail_signal)
def log_audit_trail(sender, user, request, model, event_category, method,summary,**kwargs):
    try:

        user_agent_info = request.META.get('HTTP_USER_AGENT', '<unknown>')[:255],
        print(summary)
        auditTrail = AuditTrail.objects.create(
            user=user,
            user_agent_info=user_agent_info,
            changed_object = model ,
            event_category = event_category ,
            login_IP = get_client_ip(request),
            is_deleted = False,
            action=method,
            change_summary=summary
        )
        logger.info(f"Audit trail created {auditTrail.id}  for user {auditTrail.username} and object {auditTrail.changed_object}")
    except Exception as e:

        logger.error("log_user_logged_in request: %s, error: %s" % (request, e))
5.3 Log user actions using the custom signal.
With the setup of the audit trail model and the custom signal done, it is now time to test out whether everything works as expected (finger's crossed). Head over to the views.py and in the PostAPI view
class PostAPI(generics.ListCreateAPIView):
    serializer_class = PostSerializer
    queryset = Post.objects.all().order_by("-created_at")
    permission_classes = (permissions.IsAuthenticated,)

    def perform_create(self, serializer):
        data = self.request.data
        new_post = serializer.save(
            user=self.request.user, title=data["title"], content=data["content"]
        )
        all_posts = Post.objects.all().order_by("-created_at")
        serializer = PostSerializer(all_posts, many=True)
        audit_trail_signal.send(sender=request.user.__class__, request=request,
        user=request.user, model="Blog",event_category="Blog", method="CREATE")
        return Response(serializer.data, status=status.HTTP_201_CREATED)
5.4 View to expose logs.
The logs set up is almost done, however as a dev, you may want to access the logs via an API. This is done by first creating a serializer class, the corresponding views and URLs. Go to the blog/serializers.py and paste in the following piece of code. Do not forget to import the Audit trail model.
class AuditTrailSerializer(serializers.ModelSerializer):
    class Meta:
        model = AuditTrail
        fields = (
            "id",
            "action_datetime",
            "user",
            "changed_object",
            "event_category",
            "change_summary",
        )
The addition of the AuditTrailSerializer sets the stage for the addition of the AuditTrailView and the corresponding URLs
# don't forget to import the audit trail model and serializer class

class AuditTrailView(generics.ListAPIView):
    authentication_classes = ( permissions.IsAuthenticated,)
    queryset = AuditTrail.objects.all().order_by('-created')
    serializer_class = AuditTrailSerializer
    permission_classes = ( permissions.IsAuthenticated,)
and add the URL in the blog/urls.py
#add the following line to your urls.py file
path('audit-trail/', views.AuditTrailView.as_view(), name="audit_trail"),
Congratulations, you have built a blog application using Django, Django rest framework and learnt about signals and learnt how to create and use a custom signal.
Happy hacking.